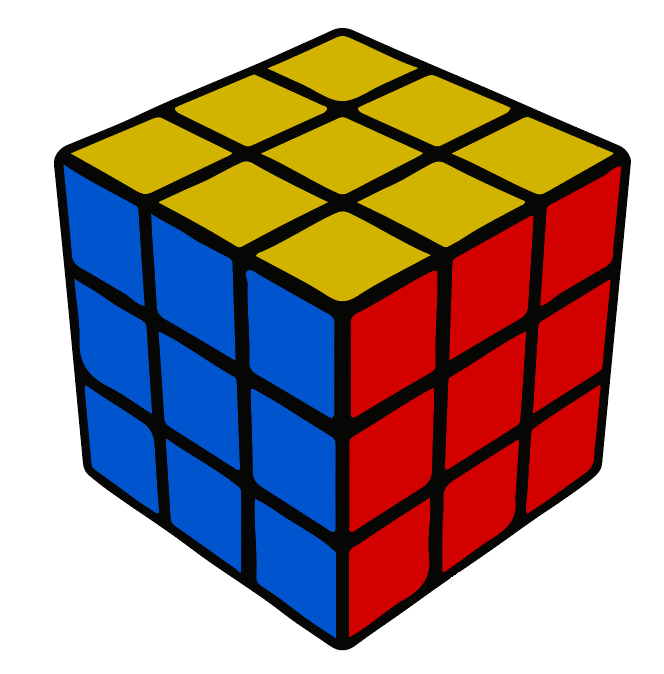
How to solve the Rubik’s Cube?
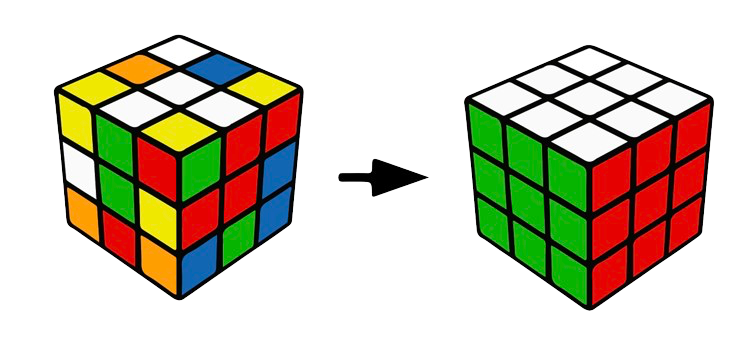
It is not that hard, you just need patience!
A bit of info about the cube:
The Rubik’s Cube is a 3-D combination puzzle invented in 1974 by Hungarian sculptor and professor of architecture Ernő Rubik.
Originally called the Magic Cube.
On the original classic Rubik’s Cube, each of the six faces was covered by nine stickers, each of one of six solid colours: white, red, blue, orange, green, and yellow.
How it works?
An internal pivot mechanism enables each face to turn independently, thus mixing up the colours. For the puzzle to be solved, each face must be returned to have only one colour.
Notation
You need to know the cube sides
Left,Up,Front,Right,Back,Down(‘L’,’U’,’F’,’R’,’B’,’D)

Algorithm
A letter on its own signifies a clockwise rotation of the face, while a counterclockwise turn is indicated with an apostrophe.

Best site for Rubik cube learning
Simulator Puzzles, Rubik’s Cube, Scrambling Tools, Reviews and Tutorials, Timer Engaging Articles

Let’s begin learning how to solve it!
White edges
With the center pieces determining the color scheme for each face, our goal is to align the white edges to match these centers. Since there are no solved pieces to complicate matters, it’s simple to rotate each white edge into its correct position.
This step isn’t too tricky since there aren’t many solved pieces to consider yet.
To figure out where each piece belongs, look at the color of the center pieces—they always stay in place. Each edge must also align with the side center piece. Refer to the attached image for clarity.
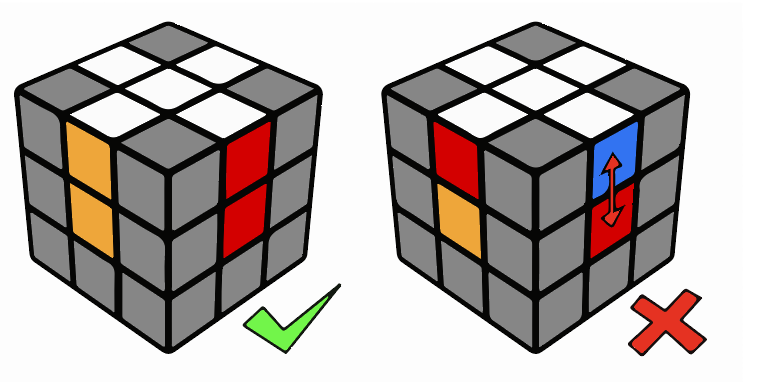
Examples that need extra moves to solve
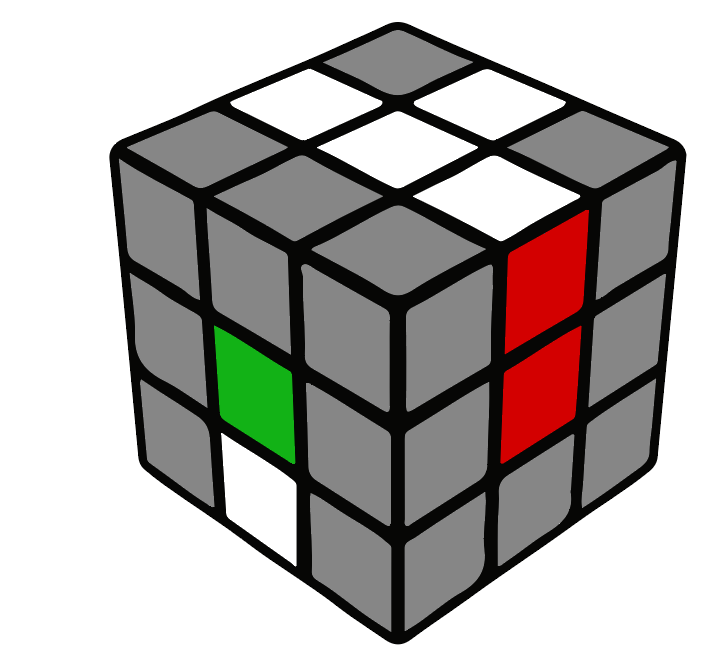
F’ R’ D’ R F2
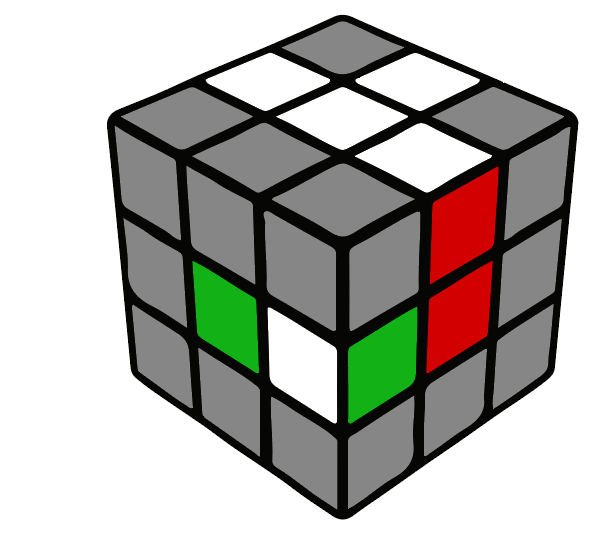
R’ D’ R F2
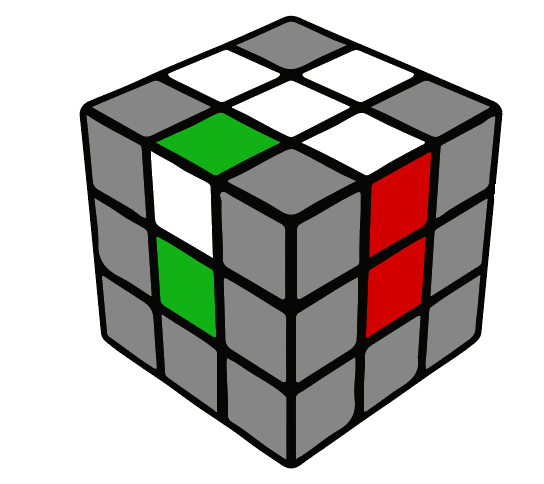
U’ R’ U F’
White Corners
With the white edges already solved, our next step is fixing the white corners to finish the first face.
Here’s a simpler way to tackle this stage without memorizing any algorithms: trust your instincts. If you’re struggling with the white corners, try this easy trick: memorize a short algorithm and keep repeating it until the piece falls into place:
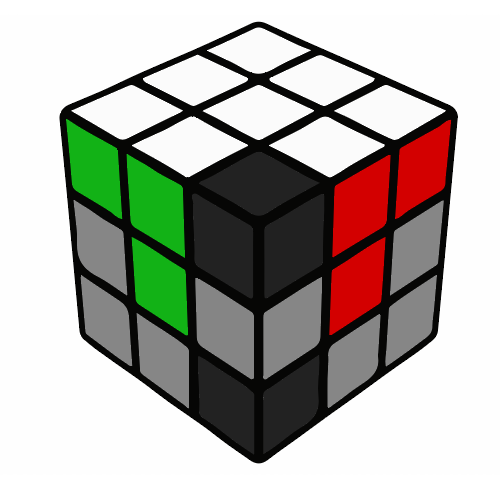
R’ D’ R D
Move the white corner to the highlighted Front-Right-Down position, then repeat the algorithm until it slots into place correctly. The algorithm will bounce the piece between the highlighted spots, adjusting its orientation each time.
Simplify the process with these easier shortcuts:
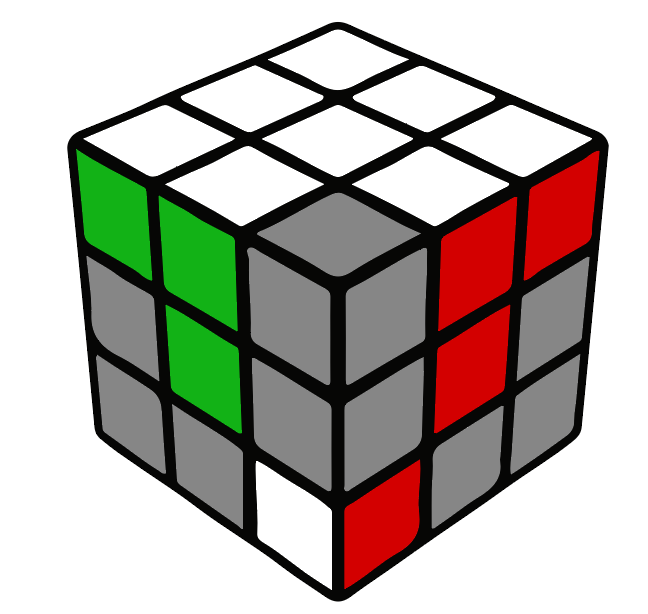
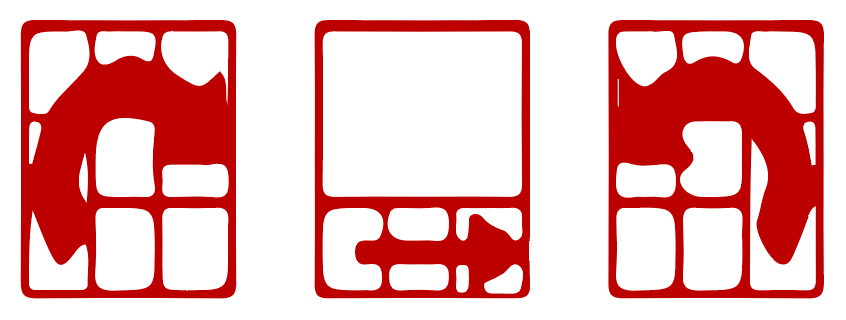
F D’ F
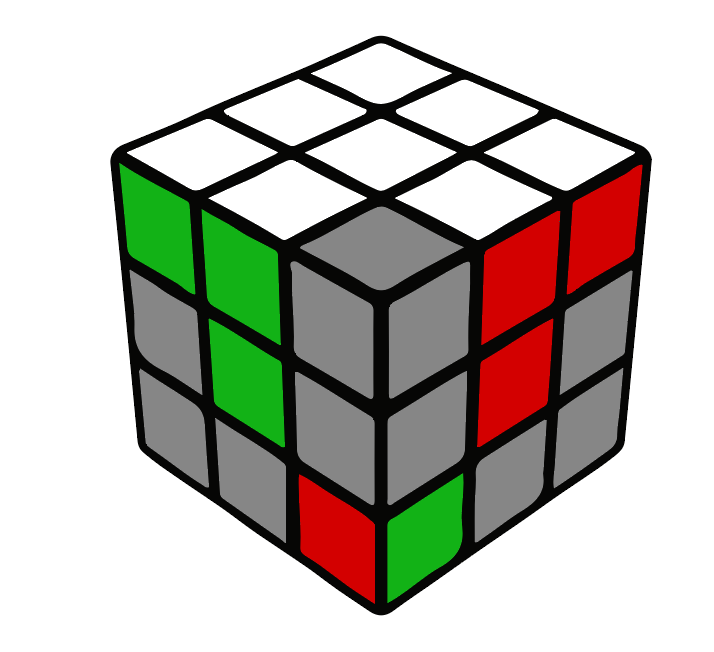

R’ D2 R D R’ D’ R
Your cube should look like this now:
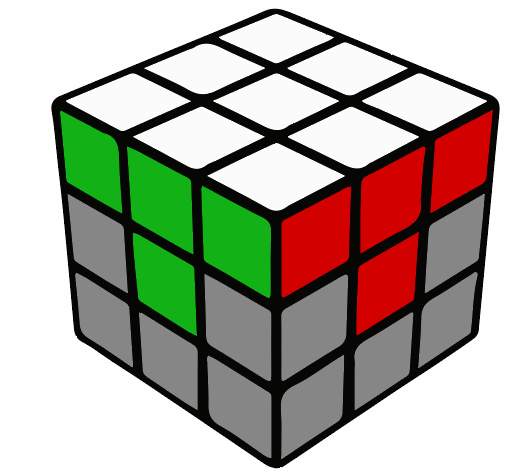
Second layer of the cube
Let’s now flip the cube upside down since we’re done with the white face.
This is where things start getting tricky for many because completing the first two layers (F2L) involves thinking ahead too much.
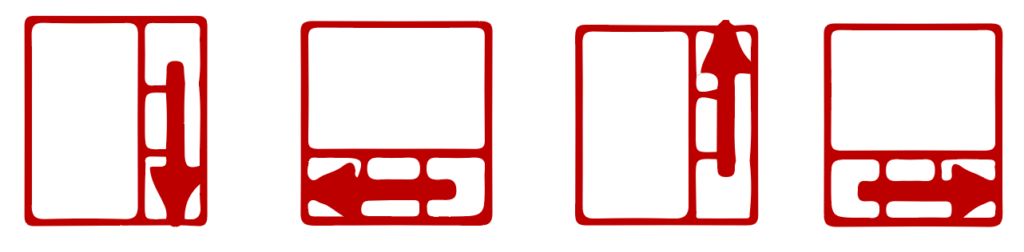
We need to learn two symmetric algorithms: Left and Right.
The Left algorithm moves the edge piece from Front-Up to the left, while the Right algorithm moves it to the right, as shown by the arrows.
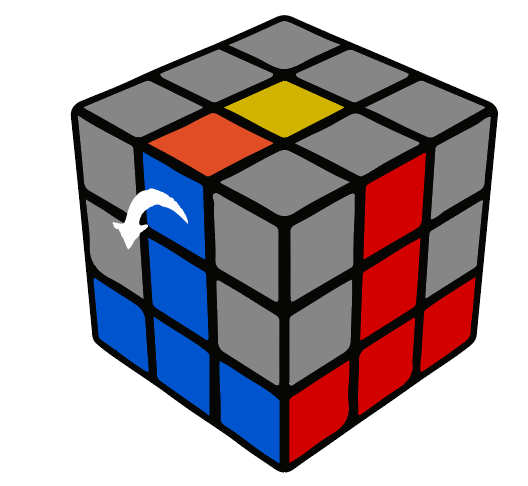
Left

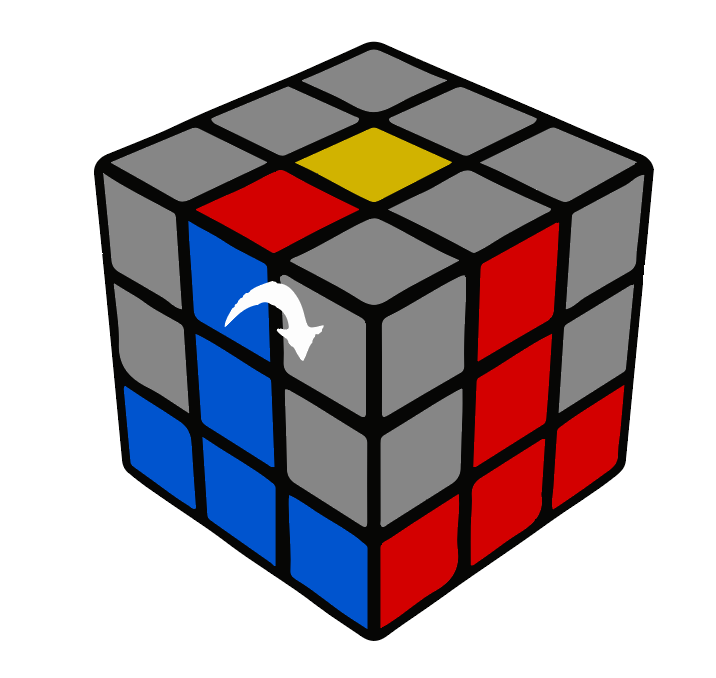
Right

If there’s no edge piece for the middle layer, just repeat the algorithm twice to dislodge it in the first step. The edge is in place but turned wrong:
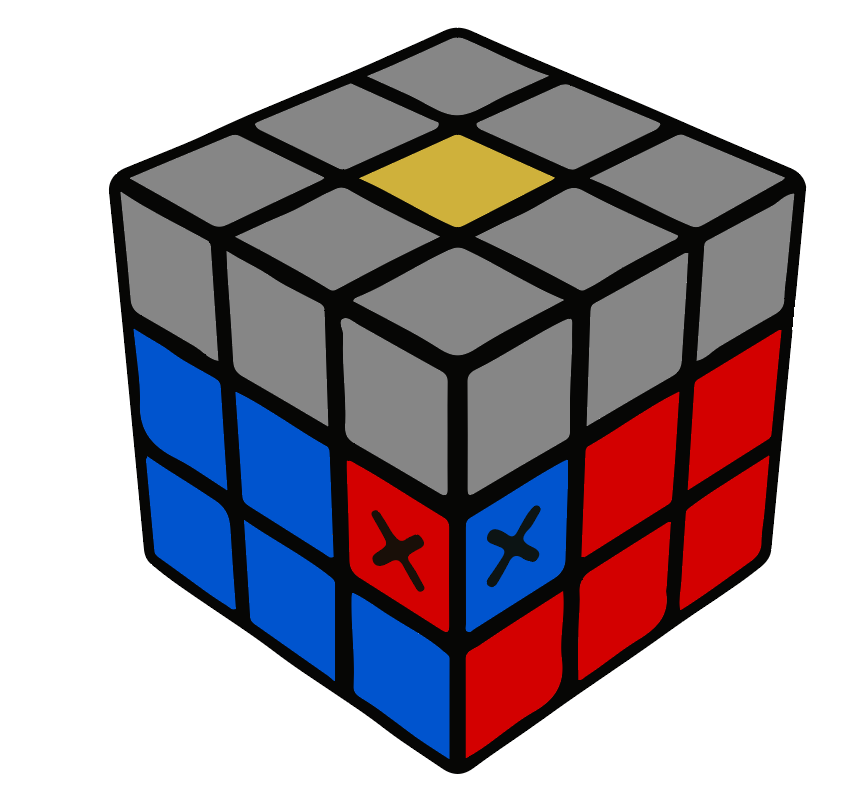
Use this algorithm:

After this step your cube should look like this:
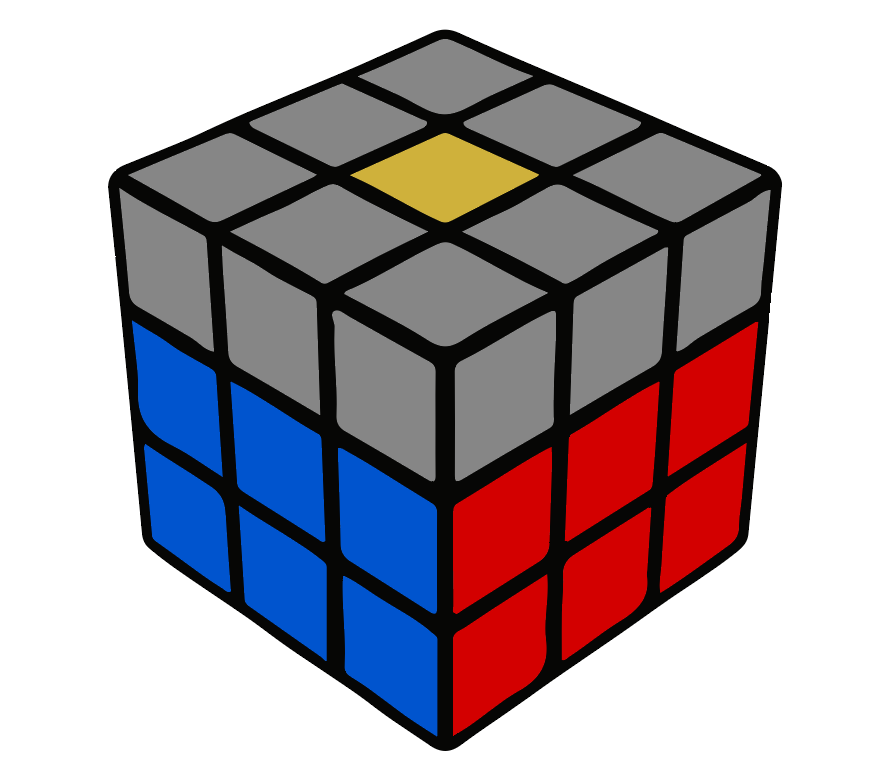
Yellow edges
We handle the yellow edges on the top of the Rubik’s Cube in two steps: First, we orient them to form a yellow cross on top. Then, we swap the pieces to match them with the side colors.
Top cross(step 1)
Now, focus on forming a yellow cross on the cube’s top face. Don’t worry about matching side colours yet—we’ll do that in the next step.
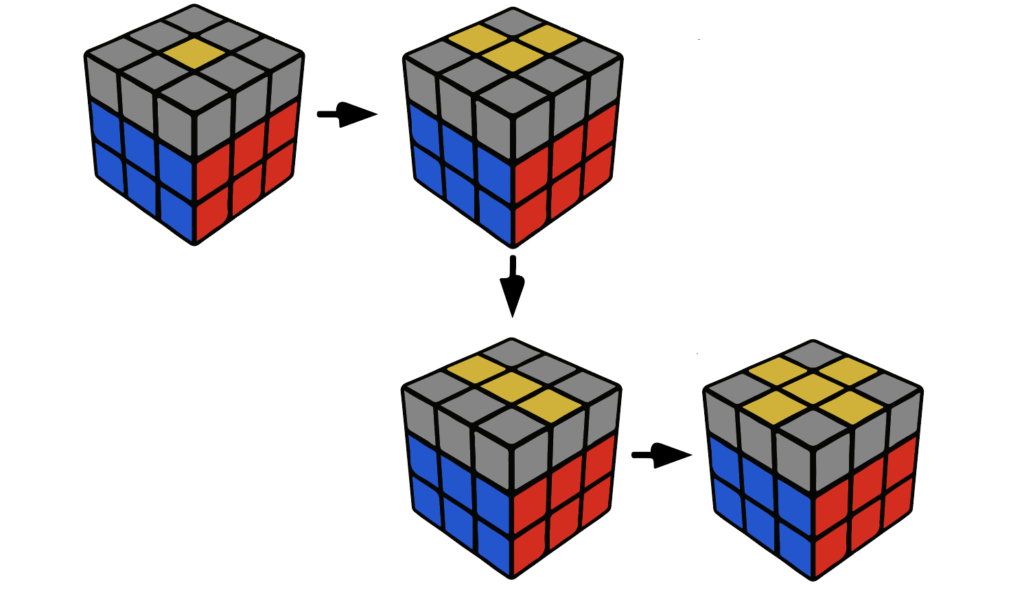
At this stage, your cube may show one of these patterns on the top.
Use the algorithm below to progress until you form the cross.

F R U R’ U’ F’
When you encounter the ‘Dot’ pattern, apply the algorithm three times.
When you see the ‘L’-shape, make sure yellow edges are on the left and back. You’re almost there—just two moves away.
For the ‘Line’ pattern, execute the algorithm once with the line held horizontally, and you’re finished.
SWAP LAST LAYER EDGES(step 2)
We’ve got the cross on top, but the yellow edge colors don’t match the sides. Let’s move them to their correct spots now. To fix this, we use an algorithm that swaps the Front-Up and Left-Up adjacent edges.
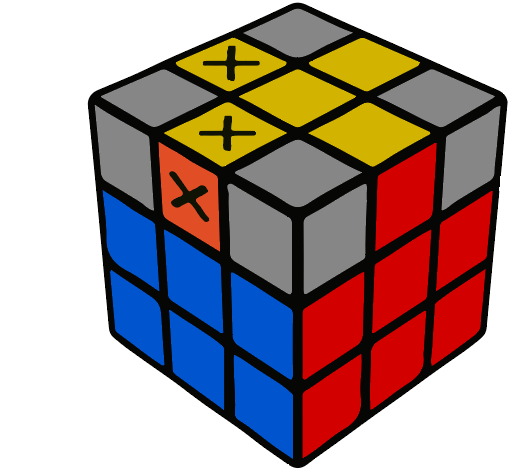

R U R’ U R U2 R’ U
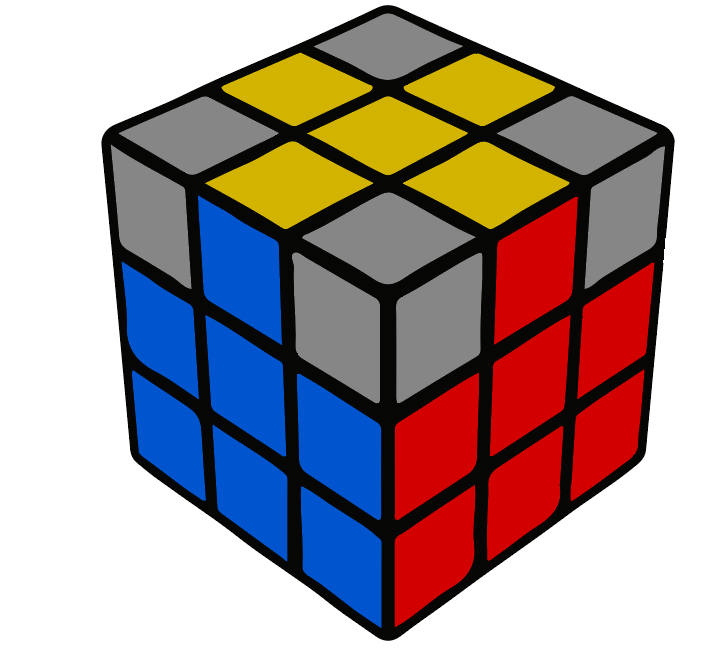
At this point, your cube should be nearly solved, with only the yellow corners left to fix
Arrange the corners of the last layer
We cycle the marked corners while keeping the Front-Right-Up corner fixed with a tick.
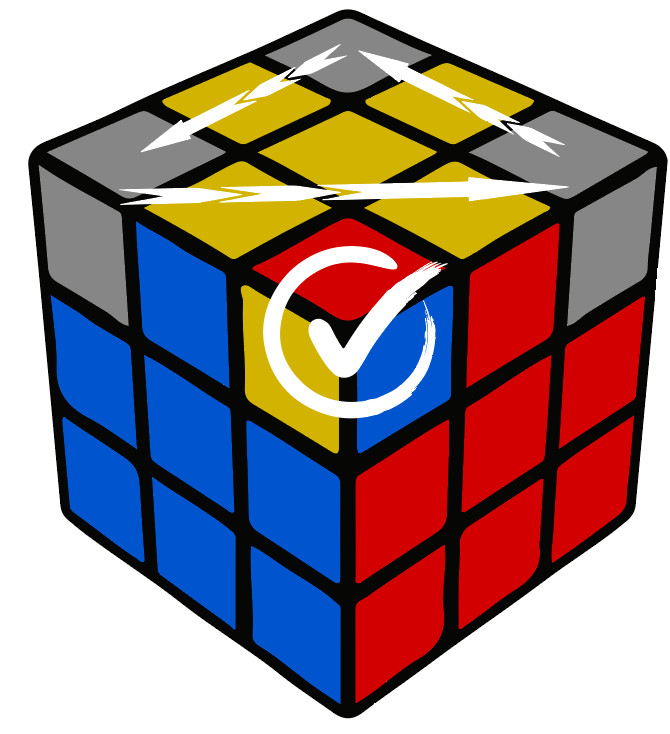

U R U’ L’ U R’ U’ L
If you spot a corner in the correct place, position it with the tick mark and use the formula. You may need to repeat it once.
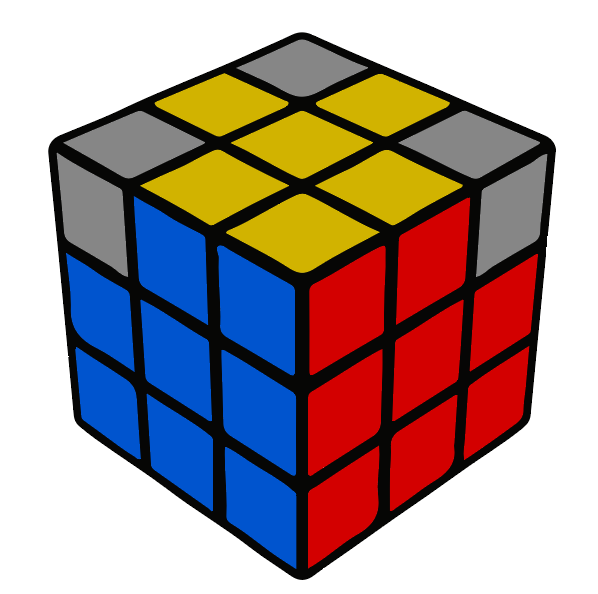
Adjust the orientation of the last layer corners.
In the last step, everything is where it should be, but the yellow corners aren’t facing the right way. We’ll use a familiar algorithm with a small adjustment to fix this.

R’ D’ R D
Hold the cube with the misaligned yellow corner in the highlighted Front-Right-Up spot. Repeat the R’ D’ R D algorithm until it’s in the right position with the yellow sticker facing up.
Place another misaligned yellow corner in the highlighted spot on the Up face. Apply the R’ D’ R D algorithm until it’s correctly oriented. Repeat for all corners until they’re all solved.
Congratulations!
Your cube should be solved!